あなたは足の脱毛にこんな疑問を持っていませんか?
- 足やひざ下の脱毛をお試し価格で体験できるサロン・クリニックは?
- 足を安くツルツルにする方法は?
- サロンとクリニックのどちらで脱毛したほうがいい?
この記事では、足を安くお試し脱毛できるキャンペーン情報を紹介します。
また、足の自己処理をしなくてもツルツルでいるためにはサロンとクリニックのどちらを選ぶべきか、ツルツルになるまでにどれくらいの回数と費用がかかるのか、についても解説します。


目次
1.足・ひざ下脱毛をお試し体験できるキャンペーン

体験キャンペーンを利用すれば、通常価格の半額以下でひざ下脱毛をお試しすることができます。
はじめに、足脱毛やひざ下脱毛を安く体験できるキャンペーンをまとめて紹介します。
1-1.足・ひざ下脱毛のお試しを安く体験できる大手脱毛サロン一覧

| サロン | キャンペーン内容:価格 |
|---|---|
| おすすめ!ジェイエステ | ひざ下・ひざ・ひざ上を各1回+両脇12回:330円 詳しい情報はこちら>> |
| TBC | ひざ下脱毛1回(スーパー&ライト脱毛):1,000円 詳しい情報はこちら>> |
| ディオーネ | ひざ下脱毛1回:3,300円 詳しい情報はこちら>> |
※価格は消費税10%込で表記しています。
足・ひざ下を含む全身脱毛のお試しキャンペーンが安いサロン
| サロン | キャンペーン内容:価格 |
|---|---|
| おすすめ!ミュゼプラチナム | 全身脱毛・顔脱毛・VIO脱毛2回、両ワキ+Vライン完了保証:200円 詳しい情報はこちら>> |
| ストラッシュ | 顔・VIOを含む全身脱毛1回:8,800円 詳しい情報はこちら>> |
| 恋肌(こいはだ) | 選べる全身脱毛34部位1回:8,400円 詳しい情報はこちら>> |
※価格は消費税10%込で表記しています。
※ストラッシュは月1回のペースで通った場合の料金(2週間に1回のペースで通って1ヶ月前に退会の申請をした場合は無料で全身脱毛を1回体験できる)
次に、ひざ下脱毛のキャンペーン内容を詳しく紹介します。
ジェイエステティック
| キャンペーン内容 | ひざ下・ひざ・ひざ上・足の甲指の足全体を1回 両脇12回(5年無料保証付き) |
|---|---|
| 価格 | 330円(税込) |
| キャンペーンの申し込み方 | 1.「まずは無料カウンセリング」のボタンをクリニック 2.ご希望のサロンを選択 3.ご希望の日時を選択 4.コース選択から美肌脱毛→「脱毛 330円」を選択 5.お客様情報を入力 6.メール配信希望を確認 7.個人情報の取り扱いについて、ご予約の注意事項を確認して同意 8.入力内容を確認し申込 |
東北
青森:青森店、八戸店、弘前店、岩手:盛岡店、北上店、宮城:仙台店、利府店、石巻店、古川店、、秋田:フレスポ秋田御所野店、山形:フレスポ山形店、イオン米沢店、天童店、三川店、福島:福島店、福島南店、郡山店、会津店、いわき店
関東
東京:北千住店、錦糸町店、大井町店、蒲田店、渋谷駅前店、二子玉川店、中野店、高田馬場店、池袋東店、立川駅前店、町田店、神奈川:川崎店、横浜西口店、本厚木店、相模大野店、茅ヶ崎店、平塚店、埼玉:大宮東店、大宮西店、川口店、川越店、志木店、所沢店、千葉:千葉店、松戸店、新鎌ヶ谷店、津田沼店、柏店、野田店、茨城:つくば店、古河店、下館店、水戸店、日立店、栃木:アピタ宇都宮店、インターパーク宇都宮店、イトーヨーカドー宇都宮店、小山店、大田原店、足利店、佐野店、群馬:前橋店
中部
静岡:静岡店、藤枝店、浜松店、愛知:豊橋店、金山店、名古屋店、岐阜:岐阜店、新潟:長岡店、亀田店、富山:富山店、石川:金沢店、小松店
関西
京都:京都駅前店、四条河原町店、西院店、滋賀:草津店、大阪:梅田店、心斎橋店、天王寺店、高槻店
中国
鳥取:鳥取店、広島:広島本通店
九州、沖縄
福岡:小倉店、天神店、久留米店、佐賀:佐賀店、大分:大分店、沖縄:那覇店
ジェイエステでは、ひざ下・ひじ・ひざ上・足の甲指の足全体を1回330円でお試しできます。
また、このキャンペーンには5年無料保証付きの両脇脱毛12回もついてくるので、脇脱毛の完了も目指せます。
お手入れがとてもスピーディーで痛みが少ないのもジェイエステの魅力の一つです。
ジェイエステのキャンペーン情報へ
TBC
| キャンペーン内容 | TBCスーパー脱毛40本 ひざ下脱毛1回(ライト脱毛) |
|---|---|
| 価格 | 1,000円(税込) |
| キャンペーンの申し込み方 | 1.上部の「今すぐ予約」のボタンをクリニック 2.ご希望の都道府県・サロン・日時を選択 3.ご希望コース詳細で「両ヒザ下1回1,000円」を選択 4.「空き状況検索」のボタンを押す 5.「この日程で予約」をクリニック 6.お客様情報の入力 7.利用規約および個人情報保護方針に同意し「はい」を選択 8.確認ボタンを押して入力内容を確認 9.申し込みボタンを押して完了 |
北海道、東北
北海道:札幌本店、札幌駅前店、旭川駅前店、イオンモール釧路昭和店、函館五稜郭店、青森:青森クロスタワー ア・ベイ店、八戸店、岩手:クロステラス盛岡店、宮城:仙台マークワン店、仙台泉中央SWING店、秋田:秋田駅前店、山形:山形店、福島:福島駅前店、郡山駅前モルティ店
関東
東京:新宿南口店、新宿東口店、渋谷店、有楽町駅前店、銀座店、有明ガーデン店、上野店、LOTTE CITY錦糸町店、北千住店、西葛西店、大泉学園店、吉祥寺店、調布駅前店、町田店、八王子店、立川髙島屋S.C.店、五反田店、自由が丘店、蒲田駅前店、池袋本店、赤羽店、神奈川:横浜西口本店、青葉台店、戸塚モディ店、川崎駅前タワー・リバーク店、上大岡店、武蔵小杉店、リドレ横須賀店、ガーデンシティ厚木店、藤沢ルミネ店、埼玉:大宮駅前店、熊谷店、南越谷店、ララガーデン春日部店、川越店、所沢店、千葉:千葉センシティ店、津田沼店、船橋駅前店、柏モディ店、木更津店、茨城:水戸店、プレイアトレ土浦店、群馬:高崎店、前橋リリカ店、栃木:宇都宮店、小山ロブレ店、山梨:甲府駅前店
中部
新潟:新潟店、長岡駅前店、長野:長野駅前店、松本店、富山:富山駅前店、石川:金沢ヴィサージュ店、福井:福井店、愛知:名古屋駅前店、名古屋駅前本店、名古屋栄店、金山店、藤ヶ丘ami ami店、豊橋ココラアベニュー店、豊田コモ・スクエア店、岡崎オトリバーサイドテラス店、岐阜:岐阜店、大垣駅前店、三重:四日市店、津駅前店、静岡:静岡エクセルワードビル店、浜松アクトタワー店、沼津イーラde店
関西
大阪:梅田本店、京橋駅前店、難波店、天王寺駅前店、高槻店、枚方店、岸和田店、堺東駅前店、千里中央店、京都:京都駅前店、京都河原町店、イオンモール京都桂川店、兵庫:ミント神戸三宮店、西宮北口店、川西店、明石駅前店、加古川店、姫路店、滋賀:エルティ草津店、奈良:サンワシティ奈良西大寺店、八木駅前店、和歌山:和歌山駅前店
中国、四国
鳥取:鳥取店、島根:松江店、岡山:岡山ターミナルスクエアビル店、広島:広島本店、さんすて福山店、呉クレスト店、山口:徳山店、徳島:徳島店、香川:高松店、愛媛:松山店、高知:イオンモール高知店
九州、沖縄
福岡:博多バスターミナル店、天神店、小倉店、イオン大野城SC店、西鉄久留米リベール店、佐賀:佐賀店、長崎:長崎店、熊本:熊本カリーノ下通店、大分:大分駅前店、宮崎:カリーノ宮崎店、鹿児島:鹿児島アイムビル店、沖縄:那覇店、イオン北谷SC店
TBCのキャンペーンでは、通常の光脱毛1回と、半永久的な効果が期待できる美容電気脱毛40本分を体験できます。
美容電気脱毛(TBCスーパー脱毛)は、毛の1本1本に電気を流して処理する脱毛法で、処理した毛は二度と生えてこなくなります。
一度で脱毛効果を実感したい人は、TBCのひざ下脱毛をお試ししてみましょう。
TBCのキャンペーン情報へ
ミュゼプラチナム
| キャンペーン内容 | 全身脱毛・顔脱毛・VIO脱毛2回、両ワキ+Vライン完了保証 (美顔エステ2回付) |
|---|---|
| 価格 | 200円(税込) |
| キャンペーンの申し込み方 | 1.「無料カウンセリング」をタップ 2.希望の店舗を選択 3.カレンダーから希望の日時を選択 4.お客様情報を入力 5.希望部位で「あし」を選択 6.申し込みのきっかけで「webバナー広告」を選択 7.個人情報の取り扱いについて同意するにチェック 8.「予約内容を確認する」をタップ 9.入力内容を確認して申し込む |
北海道、東北
北海道:札幌ル・トロワ店、イオンモール旭川西店、札幌パルコ店、JR札幌駅前店、札幌琴似店、新札幌店、CAPO大谷地店、函館昭和タウンプラザ店、青森:グラン八戸店、秋田:グランイオンモール秋田店、岩手:盛岡MOSS店、宮城:グラン先代長町インター店、山形:グラン山形ナナ・ビーンズ店、福島:イトーヨーカドー福島店、白河店、郡山安積店、郡山ザ・モール店、会津若松店、いわきラトブ店
関東
東京:有楽町店、立川北口アネックス店、新宿西口アネックス店、池袋南口アネックス店、アリオ亀有店、渋谷公園通り店、日暮里店、錦糸町駅前店、上野広小路店、銀座並木通り店、池袋南口店、池袋東口店、池袋西口店、高田馬場店、新宿東口アネックス店、新宿三丁目店、恵比寿店、自由が丘南口店、吉祥寺店、吉祥寺駅前店、立川北口店、八王子オクトーレ店、町田駅前店、町田東急ツインズ店、神奈川:横浜西口エキニアアネックス店、グラン川崎ゼロゲート店、溝口ノクティプラザ店、新百合ヶ丘エルミロード店、横浜モザイクモール港北店、横浜ららぽーと店、上大岡ミオカ店、グランアリオ橋本店、藤沢店、Luz湘南辻堂店、千葉:柏東口駅前店、アクティオーレ市川店、ミーナ津田沼店、柏高島屋ステーションモール店、ビビット南船橋店、松戸店、千葉店、グランイオンタウン成田富里店、埼玉:南越谷駅前店、川口店、大宮西口駅前店、グラン大宮店、大宮ステラタウン店、浦和店、ららぽーと富士見店、丸広百貨店上尾店、所沢店、川越店、イトーヨーカドー春日部店、熊谷ニットーモール店、茨城:イオンタウン水戸南店、イオンモールつくば店、つくばイーアス店、栃木:宇都宮インターパークスタジアム店、宇都宮駅前店、群馬:太田イオンモール店、伊勢崎スマーク店、ガーデン前橋店
中部
新潟:新潟万台シティ店、新潟上近江店、長野:ながの東急百貨店、松本パルコ店、山梨:イオンタウン山梨中央店、静岡:セントラルスクエア静岡店、遠鉄百貨店、イオン浜松西店、新静岡駅前店、石川:香林坊東急スクエア店、岐阜:グランMEGAドン・キホーテUNY岐阜店、モレラ岐阜店、富山:富山CiC店、愛知:イオンモール東浦店、アピタ名古屋北店、グラン栄店、金山店、近鉄パッセ店、デリスクエア今池店、イトーヨーカドー安城店、三重:イオンモール鈴鹿店、福井:アピタ福井大和田店
関西
滋賀:フォレオ大津一里山店、京都:京都堺町通り店、京都河原町店、京都四条通り店、MOMOテラス店、奈良:イオンモール奈良登美ヶ丘店、近鉄ならら店、大阪:イオンモール大日店、梅田駅前店、グランNU茶屋町店、京橋駅前店、グラン西梅田店、なんばCITY店、なんばパークスタワー店、近鉄難波駅前店、グラン天王寺アポロビル店、あべのキューズモール店、アリオ鳳店、兵庫:グラン三宮店、姫路店、神戸ハーバーランドumie店、アウピア明石店、和歌山:イオンモール和歌山店
中国、四国
岡山:岡山駅前店、アリオ倉敷店、島根:出雲ゆめタウン店、広島:イオンモール広島府中店、広島アルパーク店、東広島ゆめタウン店、鳥取:鳥取トリニティモール店、山口:イオン防府店、大丸下関店、徳島:徳島アミコ店、香川:高松ゆめタウン店、丸亀ゆめタウン店、高知:高知イオンモール店、愛媛:松山店
九州、沖縄
福岡:イオンモール香椎浜店、JR博多駅前店、グラン天神西通り店、西新テングッドシティ店、グラン直方店、筑紫野ゆめタウン店、リバーウォーク北九州店、佐賀:モラージュ佐賀店、長崎:みらい長崎ココウォーク店、大分:大分駅前店、大分パークプレイス店、熊本:熊本アウネ店、光の森ゆめタウン店、宮崎:宮崎宮交シティ店、鹿児島:グラン鹿児島店、沖縄:那覇新都心店
ミュゼではたった200円で、ひざ下を含む全身の脱毛を2回も体験できます。
また両脇とVラインは無制限なので、満足するまで何度でも通えます。
ひざ下脱毛の体験と同時に、両脇とVラインの脱毛を完了したい人は、ミュゼのキャンペーンをチェックしておきましょう。
ミュゼのキャンペーン情報へ
ストラッシュ
| キャンペーン内容 | 顔・VIOを含む全身脱毛1回 (月額4,400円→2ヶ月無料) |
|---|---|
| 価格 | 8,800円(税込) |
| キャンペーンの申し込み方 | 1.「まずは無料カウンセリング」のボタンをクリック 2.店舗を選択 3.カレンダーから〇印が付いている日時を選択 4.お客様情報を入力 5.「上記に同意して確認へ進む」ボタンを押す 6.入力内容を確認し申込 |
北海道、東北
北海道:札幌店、宮城:仙台店
関東
東京:新宿西口店、銀座店、池袋東口店、渋谷中央店、町田店、立川店、上野店、西葛西店、聖蹟桜ヶ丘OPA店、神奈川:横浜西口店、藤沢店、武蔵小杉店、OSC湘南シティ店、千葉:千葉店、船橋南口店、柏店、埼玉:大宮西口店、川口店、栃木:小山店、茨城:BiViつくば店
中部
新潟:新潟店、愛知:名古屋栄店、名古屋駅前店、豊田店、一宮店、豊橋ミラまち店、刈谷店、静岡:静岡店、浜松店
関西
京都:京都店、大阪:梅田店、西梅田店、天王寺店、心斎橋店、堺東店、兵庫:三宮店、アリオ加古川店、奈良:奈良店
中国
広島:広島店、福山店、岡山:岡山店
九州、沖縄
福岡:福岡天神店、小倉店、熊本:熊本店、鹿児島:鹿児島店、沖縄:那覇アネックス店
ストラッシュの2ヶ月無料キャンペーンを利用すれば、顔やVIOを含む全身脱毛を無料で1回体験することができます。
月額コースの特徴は以下の通りです。
- 全身の1/4ずつ施術を行う
- 4回通って全身1回の脱毛が完了する
- 通うペースは最短2週間に1回
- 1ヶ月前に申請すればいつでも退会できる
最短の2週間に1回のペースで通えば、無料期間の2ヶ月で全身1回分の脱毛が完了します。
また無理のない月1回のペースで通ったとしても、8,800円で全身脱毛を1回お試しすることが可能です。
ひざ下脱毛のついでに、顔やVIOも脱毛してみたい人は、ストラッシュのキャンペーンを利用しましょう。
ストラッシュのキャンペーン情報へ
恋肌(こいはだ)
| キャンペーン内容 | ①選べる全身34部位1回 ②顔・VIOを含む全身62部位1回 |
|---|---|
| 価格 | ①8,400円(税込) ②12,000円(税込) |
| キャンペーンの申し込み方 | 1.右上の「無料カウンセリング」をタップ 2.カウンセリングを受ける人数と希望の店舗を選択 3.カレンダーから希望の日時を選択 4.お客様情報を入力し「確認画面へ」をタップ 5.入力内容を確認して申し込む |
北海道、東北
北海道:札幌駅前店、札幌駅前2号店、青森:キレミカ青森店、キレミカ八戸店、岩手:キレミカ盛岡店、宮城:仙台店、キレミカ名取店、秋田:キレミカ秋田店、福島:郡山店、キレミカいわき店、キレミカ会津若松店
関東
東京:新宿南口店、新宿西口店、渋谷神南店、原宿表参道店、銀座店、池袋東口店、池袋西口店、恵比寿店、自由が丘店、吉祥寺店、立川駅前南口店、上野店、町田店、八王子店、キレミカ亀戸店、キレミカ練馬駅前店、神奈川:湘南藤沢店、横浜西口プレミアム店、川崎店、キレミカ小田原栢山店、キレミカ小田原駅前店、キレミカ秦野店、千葉:千葉店、柏店、キレミカ東船橋駅前店、キレミカ佐倉店、キレミカ木更津店、キレミカ成田店、埼玉:大宮店、熊谷店、川越店、キレミカ越谷店、栃木:宇都宮店、群馬:高崎店、茨城:キレミカつくば学園の森店、キレミカ水戸店、キレミカつくば東店、キレミカ日立店
中部
愛知:名古屋栄店、名古屋駅前店、名古屋駅前プレミアム店、豊田店、岡崎店、豊橋店、キレミカ春日井川勝店、キレミカ江南店、静岡:静岡店、浜松店、キレミカ沼津店、キレミカ沼津プリモ店、キレミカ御殿場店、岐阜:岐阜店、三重:四日市店、石川:金沢駅前店、新潟:新潟店、キレミカ上越高田店
関西
大阪:梅田プレミアム店、梅田茶屋町店、心斎橋店、なんば店、天王寺店、堺東駅前店、キレミカ貝塚店、キレミカ貝塚プレミアム店、キレミカ和泉店、京都:河原町店、四条烏丸店、兵庫:神戸三宮店、三宮プレミアム店、キレミカ西宮店、滋賀:キレミカ彦根店
中国、四国
岡山:岡山駅前店、広島:広島店、福山店、山口:キレミカ山口店、キレミカ下関店、キレミカ徳山店、キレミカ宇部店、島根:松江店、香川:キレミカ丸亀店、愛媛:松山店、高知:高知店
九州、沖縄
福岡:福岡天神店、博多駅前店、香椎駅前店、春日原店、小倉駅前店、キレミカ柳川店、佐賀:キレミカ佐賀駅前店、長崎:長崎店、佐世保店、熊本:熊本下通店、キレミカ荒尾店、キレミカ八代店、大分:大分駅前店、明野店、宮崎:宮崎店、キレミカ延岡店、鹿児島:鹿児島天文館店、鹿児島プレミアム店、キレミカ鹿屋店、沖縄:キレミカ那覇おもろまち店
恋肌(こいはだ)は、全身脱毛の総額が最安値のサロンです。
足を含む全身をまとめて安く脱毛したい人は、恋肌(こいはだ)で全身脱毛を始めましょう。
恋肌(こいはだ)のキャンペーン情報へ
1-2.足・ひざ下脱毛のお試しを安く体験できる脱毛クリニック一覧

足・ひざ下脱毛のお試しキャンペーンが安いクリニック
| クリニック | キャンペーン内容:価格 |
|---|---|
| おすすめ!聖心美容クリニック | ひざ+ひざ下1回:5,000円 詳しい情報はこちら>> |
| ミセルクリニック | ひざ下(足の甲と指含む)1回:8,140円 |
| 渋谷美容外科クリニック | ひざ1回:2,750円 ひざ下1回:8,800円 |
※価格は消費税10%込で表記しています。
では、ひざ下脱毛を安く体験できるクリニックについて詳しく紹介します。
聖心美容クリニック
| キャンペーン内容 | 両ひざ+ひざ下脱毛1回 (全額返金保証付き) |
|---|---|
| 価格 | 5,000円(税込) |
| キャンペーンの申し込み方 | 1.「ソプラノアイス・プラチナムの詳細はこちら」をタップ 2.「今すぐ無料カウンセリングを予約」をタップ 3.メールアドレスを送信 4.届いたメールのリンクをタップ 5.氏名・ふりがなを入力 6.パスワード・ニックネームを入力 7.希望の店舗を選択 8.ご相談項目で「医療脱毛」を選択 9.希望の日時を選択 10.当日の施術や案内メールについて選択 11.入力内容を確認して申し込む |
北海道
北海道:札幌院
関東
東京:東京院、埼玉:大宮院、神奈川:横浜院
中部
静岡:熱海院、愛知:名古屋院
関西
大阪:大阪院
中国
広島:広島院
九州
福岡:福岡院
海外
中国:上海院
聖心美容クリニックでは、ひざ下の医療脱毛を最も安くお試しできます。
痛みを感じたら全額返金を受けられる保証も付いているため、脱毛初心者の人にも安心です。
聖心美容クリニックのキャンペーン情報へ
ミセルクリニック
| キャンペーン内容 | ひざ下(足の甲と指含む)1回 |
|---|---|
| 価格 | 8,140円(税込) |
| キャンペーンの申し込み方 | 1.「無料カウンセリング予約へ」をタップ 2.希望の院を選択 3.希望施術で医療脱毛を選択 4.希望の日時を選択 5.お客様情報を入力 6.入力内容を確認して申し込む |
関西
大阪:大阪梅田院、兵庫:西宮院、加古川院、姫路院
九州
福岡:直方院
ミセルクリニックのひざ下脱毛は、範囲が広いのが特徴です。
ひざ下だけでなく足の甲や指まで脱毛してみたい人は、ミセルクリニックの初回限定キャンペーンを利用しましょう。
ミセルクリニックのキャンペーン情報へ
渋谷美容外科クリニック
| キャンペーン内容 | ①ひざ下1回 ②ひざ上1回 ③ひざor足甲or足指1回 |
|---|---|
| 価格 | ①8,800円(税込) ②16,500円(税込) ③2,750円(税込) |
| キャンペーンの申し込み方 | 1.下部の「脱毛予約」をタップ 2.希望のクリニックを選択 3.希望の日時を選択 4.脱毛ご希望の部位で「ヒザ下」にチェック 5.「送信」をタップ 6.入力内容を確認して申し込む |
関東
東京:新橋院、渋谷院、新宿院、池袋院、神奈川:横浜院
渋谷美容外科クリニックでは、1回2,750円で足の甲や指、ひざの脱毛を体験できます。
格安で足の気になる部位を脱毛してみたい人は、渋谷美容外科をチェックしておきましょう。
渋谷美容外科クリニックのキャンペーン情報
2.体験プランをはしごして足を安くツルツルにできる?

脱毛効果を得るには毛周期に合わせて通う必要があります。
この毛周期とは「ムダ毛が生え変わるサイクル」のことで、脱毛の光は毛周期のうち「成長期」にしか反応しません。
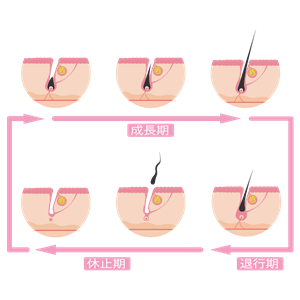
毛の成長期に合わせて脱毛サロンなら12回、クリニックで5回脱毛することで自己処理が不要になる効果を実感できます。
体験プランで多くの回数脱毛したくても脱毛サロンの場合、安く足脱毛を体験できるのはジェイエステとエピレだけです。
キャンペーンは1人1回が基本なので、はしごしても2回しか通えずツルツルになるまでの効果を実感するには回数が足りません。
ツルツルの状態を目指すなら、脱毛料金が安いところや割引キャンペーンを活用し脱毛費用を抑えて通うようにしましょう。
3.足全体をツルツルにするならサロンとクリニックどっちがいい?

足全体をツルツルになるまでお手入れしたい人は、医療脱毛ができるクリニックを選ぶのがおすすめです。
サロンとクリニックの違いについては以下の表をご覧ください。
【足脱毛】サロンとクリニックの違い
| 比較項目 | サロン | クリニック |
|---|---|---|
| お試し体験の料金 (最安値) |
足全体1回330円 (ジェイエステ) |
ひざ下1回5,000円 (聖心美容クリニック) |
| 通常料金 (最安値) |
足全体12回99,000円 (ジェイエステ) |
足全体5回75,900円 (ミラクリニック) |
| 効果 | 減毛・抑毛効果 | 永久脱毛効果 |
| 回数 | 約12回 | 約5回 |
| 期間 | 2~3年 | 1年~1年半 |
| 痛み | ほぼ痛くない | 痛みあり |
| 通いやすさ | 店舗数が多く通いやすい | 地域によっては店舗が少ない |
クリニックではサロンよりも少ない回数で完了を目指せるため、足脱毛にかかる総額を安く抑えられます。
また永久脱毛効果があり、脱毛後もツルツルの状態を維持できるのも、クリニックならではのメリットです。
低価格で足全体をツルツルにしたい人はクリニック、1回だけ安くお試し脱毛をしたい人はサロンで足脱毛を始めましょう。
4.足・ひざ下脱毛をツルツルになるまで通った場合の総額が安い脱毛クリニック
クリニックで足・ひざ下脱毛を行った場合、自己処理が不要になるまでに約5~6回かかります。
そこで5回総額が安いクリニックと、割引キャンペーンを利用すると通常料金がさらに安くなるクリニックについて紹介します。
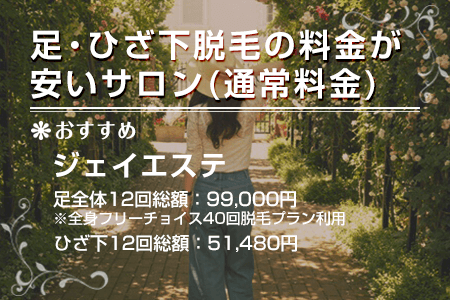
4-1.足・ひざ下脱毛の料金が安いクリニック(通常料金)
足・ひざ下脱毛の5回総額が安いクリニックを一覧にまとめました。
各クリニックの料金については以下の表をご覧ください。
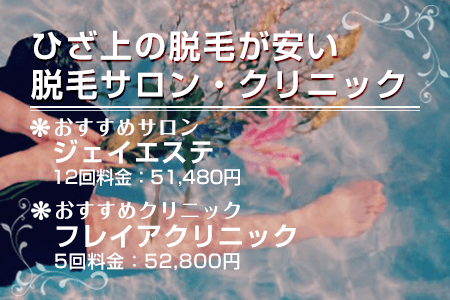
ひざ下脱毛の総額が安いクリニック
| クリニック | 5回総額 |
|---|---|
| おすすめ!渋谷美容外科クリニック | 27,500円 |
| リアラクリニック | 45,100円 |
| フレイアクリニック | 52,800円 |
| レジーナクリニック | 59,400円 |
| 新宿美容クリニック | 62,370円 |
| 平均 | 63,834円 |
| ミセルクリニック | 65,780円 |
| クレアクリニック | 67,540円 |
| 聖心美容クリニック | 79,200円 |
| ミラクリニック | 81,180円 |
| 湘南美容クリニック | 82,500円(6回) |
※価格は税込で表示しています。
足脱毛(ひざ下+膝+ひざ上+足の甲指)の5回総額が安いクリニック
| クリニック | 5回総額 |
|---|---|
| おすすめ!ミラクリニック | 75,900円 |
| フレイアクリニック | 93,500円 |
| リゼクリニック | 93,600円 |
| ミセルクリニック | 98,780円 |
| レジーナクリニック | 99,000円 |
| リアラクリニック | 101,090円 |
| 渋谷美容外科クリニック | 135,300円 |
| 平均 | 138,429円 |
| 湘南美容クリニック | 165,000円(6回) |
| 聖心美容クリニック | 184,800円 |
| クレアクリニック | 215,710円 |
| 新宿美容外科クリニック | 260,040円 |
※価格は税込で表示しています。
ひざ下脱毛が最安値の渋谷美容外科クリニックと足脱毛が最安値のミラクリニックについて詳しく紹介します。
渋谷美容外科クリニック
| 部位・回数 | 【平日昼】料金 | 【夜休日】料金 |
|---|---|---|
| ひざ下5回 | 26,125円 | 27,500円 |
| 足脱毛5回 | 128,535円 | 135,300円 |
※価格は税込で表示しています。
※ひざ下脱毛の範囲は膝を除くひざ下。
※足脱毛はひざ下+膝+ひざ上+足の甲指の合計額。
関東
東京:新橋院、渋谷院、新宿院、池袋院、神奈川:横浜院
渋谷美容外科クリニックでは、ひざ下のみの脱毛を最も安く行えます。
通常料金も格安ですが、平日17時までに通えば、さらに安くひざ下脱毛に通えます。
平日昼料金は、初回カウンセリング時に申し出た場合にのみ適用されます。
カウンセリングの際に忘れずに、スタッフさんに伝えておくようにしましょう。
渋谷美容外科クリニックのキャンペーン情報
ミラクリニック
| 部位・回数 | 5回総額 |
|---|---|
| 足脱毛5回 | 75,900円 |
| ひざ下を含む7箇所脱毛5回 | 81,180円 |
※価格は税込で表示しています。
※足脱毛の範囲はひざ下+膝+ひざ上+足の甲指。
※ひざ下を含む7箇所脱毛の範囲は「ひざ下表・ひざ下裏・ひじ下表・ひじ下裏・脇・背中上・背中下」
関東
渋谷本院
ミラクリニックでは足全体を最安値で脱毛することができます。
また露出が多いひざ下を含む7箇所をまとめて脱毛できるプランもあります。
どちらのプランも、分割払いなら月々3,000円で通えるので、気軽に足脱毛を始められます。
ミラクリニックのキャンペーン情報へ
4-2.足・ひざ下脱毛の総額が最大27%OFFになるキャンペーン

足・ひざ下脱毛の総額が最大27%OFFになるキャンペーン
| クリニック | キャンペーン内容 |
|---|---|
| おすすめ!リゼクリニック | 学割・乗り換え割・ペア割で最大20%OFF |
| ミラクリニック | 学割・乗り換え割・ペア割・親子割で最大10%割引 |
| 湘南美容クリニック | 学割で5%OFF |
| ミセルクリニック | 紹介割・乗り換え割・学割・ペア割あり(期間限定) |
| 渋谷美容外科クリニック | 平日昼割引で5%割引 紹介割で5,000円OF |
| クレアクリニック | 乗り換え割・ペア割で7,000円キャッシュバック |
| 聖心美容クリニック | 小学生50%OFF、中学生30%OFF |
クリニックのキャンペーンを利用すれば、最大で通常料金の20%OFFで足・ひざ下脱毛を始めることが可能です。
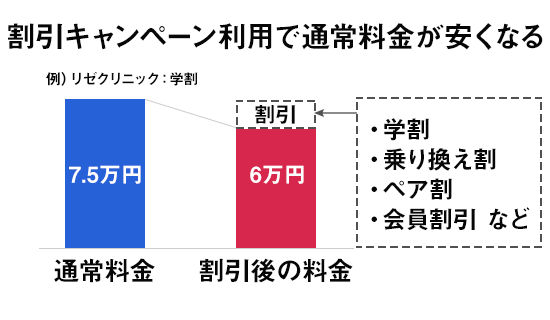
安く脱毛をしたい人は、対象になるキャンペーンのあるクリニックをチェックしておきましょう。
次に、キャンペーン適用後の足脱毛やひざ下脱毛の料金が安いクリニックをまとめて紹介します。
ひざ下脱毛の割引キャンペーン利用後の料金が最も安いクリニック
| クリニック | 通常料金 | 割引後の5回総額 |
|---|---|---|
| おすすめ!渋谷美容外科クリニック | 27,500円 | 22,500円 |
| 聖心美容クリニック | 88,000円 | 44,000円 |
| 湘南美容クリニック | 82,500円(6回) | 78,375円(6回) |
※表の価格は税込で表記しています。
足脱毛(ひざ下+膝+ひざ上+足の甲指)の割引後の料金が最も安いクリニック
| クリニック | 通常料金 | 割引後の5回総額 |
|---|---|---|
| おすすめ!ミラクリニック | 75,900円 | 68,310円 |
| リゼクリニック | 119,800円 | 74,880円 |
| 湘南美容クリニック | 165,000円(6回) | 156,750円(6回) |
※表の価格は税込で表記しています。
割引後に最も安く足脱毛を行えるミラクリニックについて詳しく紹介します。
ミラクリニック
| プラン | 割引前の5回総額 | 割引後の5回総額 |
|---|---|---|
| 足全体セット | 75,900円 | 68,310円 |
※価格は税込で表示しています。
関東
渋谷本院
ミラクリニックには足脱毛が安くなる次の4つの割引があります。
- 学割
- 乗り換え割
- ペア割
- 親子割
どれを利用しても10%割引になるので、対象になる割引がないかをチェックしておきましょう。
ミラクリニックのキャンペーン情報へ
5.足・ひざ下脱毛をツルツルになるまで通った場合の総額が安い脱毛サロン

サロンで足・ひざ下脱毛を行った場合、自己処理が不要になるまでに12回ほどかかります。
そこで12回総額が安いサロンと、割引キャンペーンを利用すると通常料金がさらに安くなるサロンについて紹介します。
5-1.足・ひざ下脱毛をツルツルになるまで通った場合の総額
ひざ下脱毛12回の料金が安いサロン
| サロン | 12回総額 | 1回あたりの料金 |
|---|---|---|
| おすすめ!ジェイエステ | 51,480円 | 4,290円 |
| TBC | 57,552円 | 4,796円 |
| ミュゼ | 31,950円(6回) | 5,325円 |
| ディオーネ | 79,200円 | 6,600円 |
| ラココ | 165,000円 | 10,312円 |
| ヴィトゥレ | 127,710円 | 10,642円 |
| プリート | 69,300円(6回) | 11,550円 |
※表の価格は税込で表記しています。
※ミュゼはレギュラープランの今だけ!特別価格(通常6回112,500円)
※ラココはオーダーメイド脱毛50回プランの料金(1回あたりの料金はひざ・ひざ下(右)・ひざ下(左)・両足の甲指の4パーツを12回脱毛した場合)
足脱毛(ひざ下+膝+ひざ上+足の甲指)12回の料金が安いサロン
| サロン | 12回総額 | 1回あたりの料金 |
|---|---|---|
| おすすめ!ジェイエステ | 99,000円 | 8,250円 |
| ミュゼ | 135,736円(無制限) | 11,311円 |
| TBC | 175,824円 | 14,652円 |
| ディオーネ | 224,400円 | 18,700円 |
| ラココ | 165,000円(8回) | 20,625円 |
| ヴィトゥレ | 304,920円 | 25,410円 |
| プリート | 178,200円(6回) | 29,700円 |
※表の価格は税込で表記しています。
※ジェイエステは全身フリーチョイス40回脱毛の料金(足全体13回+両脇12回(5年保証付き)の脱毛が可能)
※ミュゼはあしプラスAの完了保証コース(無制限)に12回通った場合
※TBCはLパーツ12回×2+Sパーツ12回×2の合計額
※ヴィトゥレはひざ上(膝含む)12回127,710円+ひざ下(膝含む)12回127,710円+足の甲指12回49,500円の合計額
※ラココはオーダーメイド脱毛50回プラン(ひざ上(右)・ひざ上(左)・両ひざ・ひざ下(右)・ひざ下(左)・両足の甲指の6パーツを約8回ずつ脱毛可)
では、足・ひざ下脱毛12回が安いサロンについて詳しく紹介します。
ジェイエステ
| 部位 | 12回の総額 |
|---|---|
| ひざ下脱毛12回 | 51,480円 |
| 膝+ひざ下12回 | 75,240円 |
| ひざ下+膝+ひざ上+足の甲指12回 | 99,000円 |
※表の価格は税込で表記しています。
※ひざ下はLパーツ1回4,290円×12回=51,480円
※膝はSパーツ1回1,980円×12回=23,760円
※ひざ下+膝+ひざ上+足の甲指12回は全身フリーチョイス40回脱毛の料金
東北
青森:青森店、八戸店、弘前店、岩手:盛岡店、北上店、宮城:仙台店、利府店、石巻店、古川店、、秋田:フレスポ秋田御所野店、山形:フレスポ山形店、イオン米沢店、天童店、三川店、福島:福島店、福島南店、郡山店、会津店、いわき店
関東
東京:北千住店、錦糸町店、大井町店、蒲田店、渋谷駅前店、二子玉川店、中野店、高田馬場店、池袋東店、立川駅前店、町田店、神奈川:川崎店、横浜西口店、本厚木店、相模大野店、茅ヶ崎店、平塚店、埼玉:大宮東店、大宮西店、川口店、川越店、志木店、所沢店、千葉:千葉店、松戸店、新鎌ヶ谷店、津田沼店、柏店、野田店、茨城:つくば店、古河店、下館店、水戸店、日立店、栃木:アピタ宇都宮店、インターパーク宇都宮店、イトーヨーカドー宇都宮店、小山店、大田原店、足利店、佐野店、群馬:前橋店
中部
静岡:静岡店、藤枝店、浜松店、愛知:豊橋店、金山店、名古屋店、岐阜:岐阜店、新潟:長岡店、亀田店、富山:富山店、石川:金沢店、小松店
関西
京都:京都駅前店、四条河原町店、西院店、滋賀:草津店、大阪:梅田店、心斎橋店、天王寺店、高槻店
中国
鳥取:鳥取店、広島:広島本通店
九州、沖縄
福岡:小倉店、天神店、久留米店、佐賀:佐賀店、大分:大分店、沖縄:那覇店
ジェイエステで足全体を脱毛する場合は、「全身フリーチョイス40回脱毛」プランを利用するのがおすすめです。
こちらのプランでひざ下とひざ上を選択すれば、「ひざ」がプレゼントで付いてきます。
また4回以上脱毛した箇所には、1回分の脱毛がプレゼントされるため、足全体を実質13回ずつ脱毛できます。
さらに、5年無料保証付きの両脇脱毛12回プランも無料で付いてきます。
足全体と両脇をまとめて安く脱毛したい人は、ジェイエステの「全身フリーチョイス40回脱毛」を選びましょう。
ジェイエステのキャンペーン情報へ
ミュゼプラチナム
| 部位 | 12回の総額 |
|---|---|
| ひざ下脱毛(6回) | 31,950円 |
| ひざ下+膝+ひざ上+足の甲指(無制限) | 135,736円 |
※表の価格は税込で表記しています。
※ひざ下+膝+ひざ上+足の甲指は、全身脱毛コースバリューのあしプラスの永久アフタ保証コース(割引後)
北海道、東北
北海道:札幌ル・トロワ店、イオンモール旭川西店、札幌パルコ店、JR札幌駅前店、札幌琴似店、新札幌店、CAPO大谷地店、函館昭和タウンプラザ店、青森:グラン八戸店、秋田:グランイオンモール秋田店、岩手:盛岡MOSS店、宮城:グラン先代長町インター店、山形:グラン山形ナナ・ビーンズ店、福島:イトーヨーカドー福島店、白河店、郡山安積店、郡山ザ・モール店、会津若松店、いわきラトブ店
関東
東京:有楽町店、立川北口アネックス店、新宿西口アネックス店、池袋南口アネックス店、アリオ亀有店、渋谷公園通り店、日暮里店、錦糸町駅前店、上野広小路店、銀座並木通り店、池袋南口店、池袋東口店、池袋西口店、高田馬場店、新宿東口アネックス店、新宿三丁目店、恵比寿店、自由が丘南口店、吉祥寺店、吉祥寺駅前店、立川北口店、八王子オクトーレ店、町田駅前店、町田東急ツインズ店、神奈川:横浜西口エキニアアネックス店、グラン川崎ゼロゲート店、溝口ノクティプラザ店、新百合ヶ丘エルミロード店、横浜モザイクモール港北店、横浜ららぽーと店、上大岡ミオカ店、グランアリオ橋本店、藤沢店、Luz湘南辻堂店、千葉:柏東口駅前店、アクティオーレ市川店、ミーナ津田沼店、柏高島屋ステーションモール店、ビビット南船橋店、松戸店、千葉店、グランイオンタウン成田富里店、埼玉:南越谷駅前店、川口店、大宮西口駅前店、グラン大宮店、大宮ステラタウン店、浦和店、ららぽーと富士見店、丸広百貨店上尾店、所沢店、川越店、イトーヨーカドー春日部店、熊谷ニットーモール店、茨城:イオンタウン水戸南店、イオンモールつくば店、つくばイーアス店、栃木:宇都宮インターパークスタジアム店、宇都宮駅前店、群馬:太田イオンモール店、伊勢崎スマーク店、ガーデン前橋店
中部
新潟:新潟万台シティ店、新潟上近江店、長野:ながの東急百貨店、松本パルコ店、山梨:イオンタウン山梨中央店、静岡:セントラルスクエア静岡店、遠鉄百貨店、イオン浜松西店、新静岡駅前店、石川:香林坊東急スクエア店、岐阜:グランMEGAドン・キホーテUNY岐阜店、モレラ岐阜店、富山:富山CiC店、愛知:イオンモール東浦店、アピタ名古屋北店、グラン栄店、金山店、近鉄パッセ店、デリスクエア今池店、イトーヨーカドー安城店、三重:イオンモール鈴鹿店、福井:アピタ福井大和田店
関西
滋賀:フォレオ大津一里山店、京都:京都堺町通り店、京都河原町店、京都四条通り店、MOMOテラス店、奈良:イオンモール奈良登美ヶ丘店、近鉄ならら店、大阪:イオンモール大日店、梅田駅前店、グランNU茶屋町店、京橋駅前店、グラン西梅田店、なんばCITY店、なんばパークスタワー店、近鉄難波駅前店、グラン天王寺アポロビル店、あべのキューズモール店、アリオ鳳店、兵庫:グラン三宮店、姫路店、神戸ハーバーランドumie店、アウピア明石店、和歌山:イオンモール和歌山店
中国、四国
岡山:岡山駅前店、アリオ倉敷店、島根:出雲ゆめタウン店、広島:イオンモール広島府中店、広島アルパーク店、東広島ゆめタウン店、鳥取:鳥取トリニティモール店、山口:イオン防府店、大丸下関店、徳島:徳島アミコ店、香川:高松ゆめタウン店、丸亀ゆめタウン店、高知:高知イオンモール店、愛媛:松山店
九州、沖縄
福岡:イオンモール香椎浜店、JR博多駅前店、グラン天神西通り店、西新テングッドシティ店、グラン直方店、筑紫野ゆめタウン店、リバーウォーク北九州店、佐賀:モラージュ佐賀店、長崎:みらい長崎ココウォーク店、大分:大分駅前店、大分パークプレイス店、熊本:熊本アウネ店、光の森ゆめタウン店、宮崎:宮崎宮交シティ店、鹿児島:グラン鹿児島店、沖縄:那覇新都心店
ミュゼの完了保証コースを利用すれば、回数や期間の制限なく何度でも足脱毛に通えます。
ツルツルになるまで安く足脱毛に通いたい人は、ミュゼをチェックしておきましょう。
ミュゼのキャンペーン情報へ
TBC
| 部位 | 12回の総額 |
|---|---|
| ひざ下脱毛12回 | 57,552円 |
| 膝+ひざ下12回 | 87,912円 |
| ひざ下+膝+ひざ上+足の甲指12回 | 175,824円 |
※表の価格は税込で表記しています。
北海道、東北
北海道:札幌本店、札幌駅前店、旭川駅前店、イオンモール釧路昭和店、函館五稜郭店、青森:青森クロスタワー ア・ベイ店、八戸店、岩手:クロステラス盛岡店、宮城:仙台マークワン店、仙台泉中央SWING店、秋田:秋田駅前店、山形:山形店、福島:福島駅前店、郡山駅前モルティ店
関東
東京:新宿南口店、新宿東口店、渋谷店、有楽町駅前店、銀座店、有明ガーデン店、上野店、LOTTE CITY錦糸町店、北千住店、西葛西店、大泉学園店、吉祥寺店、調布駅前店、町田店、八王子店、立川髙島屋S.C.店、五反田店、自由が丘店、蒲田駅前店、池袋本店、赤羽店、神奈川:横浜西口本店、青葉台店、戸塚モディ店、川崎駅前タワー・リバーク店、上大岡店、武蔵小杉店、リドレ横須賀店、ガーデンシティ厚木店、藤沢ルミネ店、埼玉:大宮駅前店、熊谷店、南越谷店、ララガーデン春日部店、川越店、所沢店、千葉:千葉センシティ店、津田沼店、船橋駅前店、柏モディ店、木更津店、茨城:水戸店、プレイアトレ土浦店、群馬:高崎店、前橋リリカ店、栃木:宇都宮店、小山ロブレ店、山梨:甲府駅前店
中部
新潟:新潟店、長岡駅前店、長野:長野駅前店、松本店、富山:富山駅前店、石川:金沢ヴィサージュ店、福井:福井店、愛知:名古屋駅前店、名古屋駅前本店、名古屋栄店、金山店、藤ヶ丘ami ami店、豊橋ココラアベニュー店、豊田コモ・スクエア店、岡崎オトリバーサイドテラス店、岐阜:岐阜店、大垣駅前店、三重:四日市店、津駅前店、静岡:静岡エクセルワードビル店、浜松アクトタワー店、沼津イーラde店
関西
大阪:梅田本店、京橋駅前店、難波店、天王寺駅前店、高槻店、枚方店、岸和田店、堺東駅前店、千里中央店、京都:京都駅前店、京都河原町店、イオンモール京都桂川店、兵庫:ミント神戸三宮店、西宮北口店、川西店、明石駅前店、加古川店、姫路店、滋賀:エルティ草津店、奈良:サンワシティ奈良西大寺店、八木駅前店、和歌山:和歌山駅前店
中国、四国
鳥取:鳥取店、島根:松江店、岡山:岡山ターミナルスクエアビル店、広島:広島本店、さんすて福山店、呉クレスト店、山口:徳山店、徳島:徳島店、香川:高松店、愛媛:松山店、高知:イオンモール高知店
九州、沖縄
福岡:博多バスターミナル店、天神店、小倉店、イオン大野城SC店、西鉄久留米リベール店、佐賀:佐賀店、長崎:長崎店、熊本:熊本カリーノ下通店、大分:大分駅前店、宮崎:カリーノ宮崎店、鹿児島:鹿児島アイムビル店、沖縄:那覇店、イオン北谷SC店
TBCのひざ下12回コースは、初回カウンセリング当日に申し込むだけで3,000円割引になります。
ひざ下脱毛にかかる費用を抑えたい人は、カウンセリング当日に申し込めるように準備をしておきましょう。
TBCのキャンペーン情報へ
5-2.足・ひざ下脱毛の総額が最大30%OFFになるキャンペーン
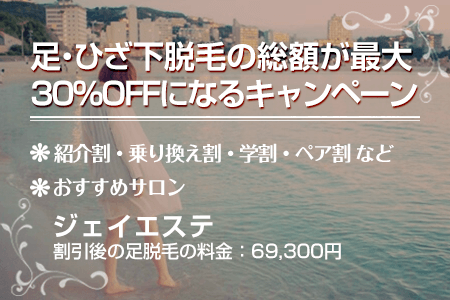
足・ひざ下脱毛の総額が安くなる脱毛サロンのキャンペーン一覧
| サロン | キャンペーン内容 |
|---|---|
| おすすめ!ジェイエステ | 紹介割・ペア割・乗り換え割・中高生応援割・ファミリー会員で最大30%OFF |
| ミュゼ | デイプラン・割引パスポートで50%OFF、TEENS割で20%OFF、紹介割で10%OFF |
| TBC | 紹介割10,000円OFF+初回特典最大5,000円OFF |
| エピレ | 紹介割10,000円OFF+初回特典最大5,000円OFF |
| ディオーネ | 学割で10%OFF(店舗限定) |
| エステ・タイム | 紹介割・乗り換え割で最大2万円OFF |
| ラココ | 学割・紹介割・乗り換え割・ペア割で10%キャッシュバック |
| プリート | 紹介割で20%OFF、ペア割で10%OFF |
割引キャンペーンを利用すれば、最大で通常料金の30%OFFでひざ下脱毛を始めることが可能です。
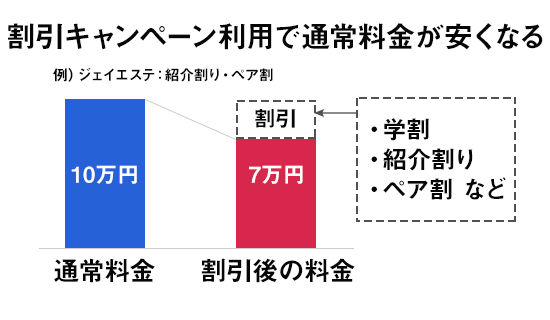
より安くひざ下脱毛をしたい人は、適用できるキャンペーンがないかチェックしておきましょう。
次に、ひざ下・足脱毛の割引キャンペーン利用後の料金が最も安い脱毛サロンを紹介します。
ひざ下脱毛の割引キャンペーン利用後の料金が最も安いサロン
| サロン | 通常料金 | 割引後の料金 |
|---|---|---|
| おすすめ!ミュゼプラチナム | 112,500円(6回) | 25,796円(6回) |
| ジェイエステ | 51,480円(12回) | 36,036円(12回) |
※表の価格は税込で表記しています。
※ミュゼ:通常料金はレギュラープランの通常価格、割引後の料金はデイプラン(平日12時~18時)の今だけ特別価格
足脱毛(ひざ下+膝+ひざ上+足の甲指)の割引後の料金が最も安いサロン
| サロン | 通常料金 | 割引後の料金 |
|---|---|---|
| おすすめ!ジェイエステ | 99,000円 | 69,300円 |
| ミュゼ | 355,920円(6回) | 135,736円(無制限) |
※表の価格は税込で表記しています。
※ジェイエステは「全身フリーチョイス40回脱毛」を利用した場合(足全体13回+両脇12回(5年保証付き)を脱毛できる)
※ミュゼの割引後の料金は、デイプラン、アプリDL限定半額!!、当日限定25%OFF、30万円チケット、LINE連携チケット適用後の価格
キャンペーン適用後のひざ下毛が最も安いミュゼと、足全体の脱毛が最も安いジェイエステについて詳しく紹介します。
ミュゼプラチナム
| 部位 | 割引前の総額 | 割引後の総額 |
|---|---|---|
| ひざ下6回 | 112,500円 | 25,796円 |
| 膝12回+ひざ下6回 | 225,000円 | 51,592円/td> |
| 足全体 | 355,920円(6回) | 135,736円(無制限) |
※表の価格は税込で表記しています。
※割引前の総額は、レギュラープランの通常価格
※ひざ下6回、膝12回+ひざ下6回の割引後の総額は、デイプランの今だけ特別価格
※足全体の割引後の総額は、全身脱毛コースバリュー(あしプラスA)を利用し、デイプラン、アプリDL限定半額!!、当日限定25%OFF、30万円チケット、LINE連携チケット適用後の価格
北海道、東北
北海道:札幌ル・トロワ店、イオンモール旭川西店、札幌パルコ店、JR札幌駅前店、札幌琴似店、新札幌店、CAPO大谷地店、函館昭和タウンプラザ店、青森:グラン八戸店、秋田:グランイオンモール秋田店、岩手:盛岡MOSS店、宮城:グラン先代長町インター店、山形:グラン山形ナナ・ビーンズ店、福島:イトーヨーカドー福島店、白河店、郡山安積店、郡山ザ・モール店、会津若松店、いわきラトブ店
関東
東京:有楽町店、立川北口アネックス店、新宿西口アネックス店、池袋南口アネックス店、アリオ亀有店、渋谷公園通り店、日暮里店、錦糸町駅前店、上野広小路店、銀座並木通り店、池袋南口店、池袋東口店、池袋西口店、高田馬場店、新宿東口アネックス店、新宿三丁目店、恵比寿店、自由が丘南口店、吉祥寺店、吉祥寺駅前店、立川北口店、八王子オクトーレ店、町田駅前店、町田東急ツインズ店、神奈川:横浜西口エキニアアネックス店、グラン川崎ゼロゲート店、溝口ノクティプラザ店、新百合ヶ丘エルミロード店、横浜モザイクモール港北店、横浜ららぽーと店、上大岡ミオカ店、グランアリオ橋本店、藤沢店、Luz湘南辻堂店、千葉:柏東口駅前店、アクティオーレ市川店、ミーナ津田沼店、柏高島屋ステーションモール店、ビビット南船橋店、松戸店、千葉店、グランイオンタウン成田富里店、埼玉:南越谷駅前店、川口店、大宮西口駅前店、グラン大宮店、大宮ステラタウン店、浦和店、ららぽーと富士見店、丸広百貨店上尾店、所沢店、川越店、イトーヨーカドー春日部店、熊谷ニットーモール店、茨城:イオンタウン水戸南店、イオンモールつくば店、つくばイーアス店、栃木:宇都宮インターパークスタジアム店、宇都宮駅前店、群馬:太田イオンモール店、伊勢崎スマーク店、ガーデン前橋店
中部
新潟:新潟万台シティ店、新潟上近江店、長野:ながの東急百貨店、松本パルコ店、山梨:イオンタウン山梨中央店、静岡:セントラルスクエア静岡店、遠鉄百貨店、イオン浜松西店、新静岡駅前店、石川:香林坊東急スクエア店、岐阜:グランMEGAドン・キホーテUNY岐阜店、モレラ岐阜店、富山:富山CiC店、愛知:イオンモール東浦店、アピタ名古屋北店、グラン栄店、金山店、近鉄パッセ店、デリスクエア今池店、イトーヨーカドー安城店、三重:イオンモール鈴鹿店、福井:アピタ福井大和田店
関西
滋賀:フォレオ大津一里山店、京都:京都堺町通り店、京都河原町店、京都四条通り店、MOMOテラス店、奈良:イオンモール奈良登美ヶ丘店、近鉄ならら店、大阪:イオンモール大日店、梅田駅前店、グランNU茶屋町店、京橋駅前店、グラン西梅田店、なんばCITY店、なんばパークスタワー店、近鉄難波駅前店、グラン天王寺アポロビル店、あべのキューズモール店、アリオ鳳店、兵庫:グラン三宮店、姫路店、神戸ハーバーランドumie店、アウピア明石店、和歌山:イオンモール和歌山店
中国、四国
岡山:岡山駅前店、アリオ倉敷店、島根:出雲ゆめタウン店、広島:イオンモール広島府中店、広島アルパーク店、東広島ゆめタウン店、鳥取:鳥取トリニティモール店、山口:イオン防府店、大丸下関店、徳島:徳島アミコ店、香川:高松ゆめタウン店、丸亀ゆめタウン店、高知:高知イオンモール店、愛媛:松山店
九州、沖縄
福岡:イオンモール香椎浜店、JR博多駅前店、グラン天神西通り店、西新テングッドシティ店、グラン直方店、筑紫野ゆめタウン店、リバーウォーク北九州店、佐賀:モラージュ佐賀店、長崎:みらい長崎ココウォーク店、大分:大分駅前店、大分パークプレイス店、熊本:熊本アウネ店、光の森ゆめタウン店、宮崎:宮崎宮交シティ店、鹿児島:グラン鹿児島店、沖縄:那覇新都心店
ミュゼには、TEENS割や紹介割もあり、各種キャンペーンやチケットとの併用も可能です。
TEENS割の20%OFFは次の2つに当てはまれば対象になります。
- 18歳未満
- 各コース4回以上の契約
また紹介割の10%OFFは、友達から送ってもらった紹介メッセージに記載されているURLからWEB予約をすれば適用されます。
他にも期間限定の割引キャンペーンやデイプランなど、誰でも使える割引も複数あるので、ぜひチェックしてみてください。
ミュゼのキャンペーン情報へ
ジェイエステティック
| 部位 | 割引前の12回総額 | 割引後の12回総額 |
|---|---|---|
| ひざ下 | 51,480円 | 36,036円 |
| 膝+ひざ下 | 75,240円 | 52,668円 |
| 足全体 | 99,000円 | 69,300円 |
※表の価格は税込で表記しています。
※割引後の料金はファミリー会員割30%OFFを利用した場合。
※ひざ下+膝+ひざ上+足の甲指12回は全身フリーチョイス40回脱毛の料金。
東北
青森:青森店、八戸店、弘前店、岩手:盛岡店、北上店、宮城:仙台店、利府店、石巻店、古川店、、秋田:フレスポ秋田御所野店、山形:フレスポ山形店、イオン米沢店、天童店、三川店、福島:福島店、福島南店、郡山店、会津店、いわき店
関東
東京:北千住店、錦糸町店、大井町店、蒲田店、渋谷駅前店、二子玉川店、中野店、高田馬場店、池袋東店、立川駅前店、町田店、神奈川:川崎店、横浜西口店、本厚木店、相模大野店、茅ヶ崎店、平塚店、埼玉:大宮東店、大宮西店、川口店、川越店、志木店、所沢店、千葉:千葉店、松戸店、新鎌ヶ谷店、津田沼店、柏店、野田店、茨城:つくば店、古河店、下館店、水戸店、日立店、栃木:アピタ宇都宮店、インターパーク宇都宮店、イトーヨーカドー宇都宮店、小山店、大田原店、足利店、佐野店、群馬:前橋店
中部
静岡:静岡店、藤枝店、浜松店、愛知:豊橋店、金山店、名古屋店、岐阜:岐阜店、新潟:長岡店、亀田店、富山:富山店、石川:金沢店、小松店
関西
京都:京都駅前店、四条河原町店、西院店、滋賀:草津店、大阪:梅田店、心斎橋店、天王寺店、高槻店
中国
鳥取:鳥取店、広島:広島本通店
九州、沖縄
福岡:小倉店、天神店、久留米店、佐賀:佐賀店、大分:大分店、沖縄:那覇店
ジェイエステには、母娘・姉妹で通うだけで足脱毛の料金が30%OFFになる「ファミリー会員割」があります。
有効期限は入会から1年なので、対象になる人は早めに申し込んでおきましょう。
ジェイエステのキャンペーン情報へ
6.足・ひざ下で脱毛するパーツを絞ると安く脱毛できる

膝やひざ上だけを安くお手入れできるサロン・クリニックをまとめて紹介します。
6-1.ひざの脱毛が安い脱毛サロン・クリニック

ひざの脱毛が安いサロンの12回料金
| サロン | 12回料金 |
|---|---|
| おすすめ!ジェイエステ | 23,760円 |
| ミュゼ | 25,796円 |
| TBC | 30,360円 |
| 平均 | 32,019円 |
| ディオーネ | 33,000円 |
| ラココ | 39,600円 |
| プリート | 39,600円 |
※価格は税込で表示しています。
※ミュゼはデイプランの今だけ特別価格(レギュラープランは12回31,950円)
※プリートの12回料金は、6回19,800円×2の総額
ひざ上脱毛が安いサロンの12回料金
| サロン | 12回料金 |
|---|---|
| おすすめ!ジェイエステ | 51,480円 |
| ミュゼ | 51,592円 |
| TBC | 57,552円 |
| ディオーネ | 85,800円 |
| 平均 | 98,477円 |
| ヴィトゥレ | 127,710円 |
| プリート | 138,600円 |
| ラココ | 165,000円 |
※価格は税込で表示しています。
ひざの脱毛が安いクリニックの5回料金
| クリニック | 5回料金 |
|---|---|
| おすすめ!渋谷美容外科クリニック | 8,800円 |
| リアラクリニック | 14,300円 |
| クレアクリニック | 21,010円 |
| 平均 | 23,176円 |
| 湘南美容クリニック | 29,280円(6回) |
| 聖心美容クリニック | 30,800円 |
| 新宿美容外科クリニック | 34,870円 |
※価格は税込で表示しています。
安く早くひざ脱毛の完了を目指せるのは、渋谷美容外科クリニックです。
痛みが少ないサロンで膝のみを安く脱毛したい人は、ジェイエステやミュゼでひざ脱毛を始めましょう。
6-2.ひざ上の脱毛が安いサロン・クリニック
ひざ上脱毛が安いサロンの12回料金
| サロン | 12回料金 |
|---|---|
| おすすめ!ジェイエステ | 51,480円 |
| ミュゼ | 51,592円 |
| TBC | 57,552円 |
| ディオーネ | 85,800円 |
| 平均 | 98,477円 |
| ヴィトゥレ | 127,710円 |
| プリート | 138,600円 |
| ラココ | 165,000円 |
※価格は税込で表示しています。
※ミュゼはデイプランの今だけ特別価格(レギュラープランは12回31,950円)
※プリートの12回料金は、6回69,300円×2の総額
※ラココはオーダーメイド脱毛50回プラン(ひざ上(右)・ひざ上(左)を約24回ずつ脱毛可)
ひざ上脱毛が安いクリニックの5回料金
| クリニック | 5回料金 |
|---|---|
| おすすめ!フレイアクリニック | 52,800円 |
| 渋谷美容外科クリニック | 55,000円 |
| リアラクリニック | 59,400円 |
| ミセルクリニック | 65,780円 |
| レジーナクリニック | 72,600円 |
| 平均 | 78,258円 |
| 湘南美容クリニック | 82,500円 |
| 聖心美容クリニック | 83,600円 |
| クレアクリニック | 106,150円 |
| 新宿美容外科クリニック | 126,500円 |
※価格は税込で表示しています。
ひざ上のみを最も安く脱毛できるのは、ジェイエステです。
とにかく安くひざ上脱毛に通いたい人はジェイエステ、短期間でひざ下脱毛を完了したい人はフレイアクリニックや渋谷美容外科クリニックを選びましょう。
7.足・ひざ下脱毛の体験談・口コミ
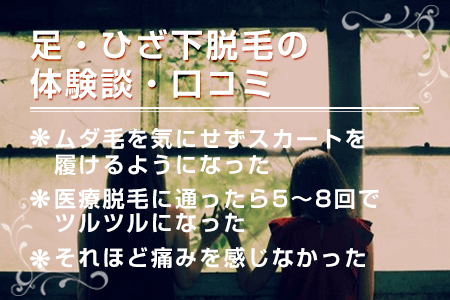
実際に足脱毛やひざ下脱毛をした人の体験談をまとめて紹介します。
- 「足を含めて全身を8回脱毛。かなりスッキリして、何も気にせずスカートを履いて足を出せる程度になりました!」
- 「5回分の脱毛が終了!毎日剃らないといけないレベルが1ヶ月剃らなくても気にならないレベルになったのが本当に嬉しい。毛穴も目立たなくなったし、足が特に綺麗になったと思う。医療脱毛だから値段は高かったけど、やって良かった!!」
- 「ひざ下の医療脱毛に行ってきた。痛いと思ってたけど、ほぼ痛みナシ。以前やった脇とVラインの光脱毛の方がだいぶ痛かった。毛の密度で変わってくるのかも。」
- 「医療脱毛全5回のうち3回目が終わってから足の毛がほぼ生えてこない…すごい!こんなに効果があるとは驚きです。」
- 「ひざ下を脱毛したんだけど、ひざ上もやっとけばよかったと後悔中。太ももの毛がフサフサで気になる…。」
足・ひざ下脱毛の体験談・口コミまとめ
- ムダ毛を気にせずスカートを履けるようになった
- 医療脱毛に通ったら5~8回でツルツルになった
- ひざ下は医療脱毛でもそれほど痛みを感じなかった
- 3回目が終わって毛が生えてくる速度が遅くなった
- ひざ下だけじゃなくひざ上も脱毛しておけば良かった
8.足脱毛のお試し体験で注意しておきたいポイント

足脱毛のお試し体験で特に注意が必要な5つのポイントについて詳しく紹介します。
8-1.光脱毛やレーザー脱毛をする場合は前日までにムダ毛を剃っておく

足脱毛を体験前には、施術方法に合わせて次のようにムダ毛を整えておく必要があります。
- 光脱毛:2㎜以下にシェービング
- レーザー脱毛:2㎜以下にシェービング
- 美容電気脱毛:2~3mm以上に伸ばす
美容電気脱毛は肌表面に生えている毛を1本ずつ処理する方法なので、ムダ毛が伸びていなければ脱毛できません。
一方、光脱毛やレーザー脱毛は、光を照射して熱で発毛組織にダメージを与える仕組みになっています。
ムダ毛が伸びていると肌表面の毛に光が反応して痛みや肌トラブルの原因になるため、脱毛前には必ずシェービングを行います。
直前に剃ると肌に負担がかかるので、前日までに電動シェーバーでムダ毛を剃っておきましょう。
8-2.アルコール不使用のボディジェルでしっかり保湿ケアを行う

肌が乾燥している時に足脱毛の施術を受けると、次のようなリスクが高くなります。
- 強い痛みを感じる
- やけどなどの肌トラブルが起こる
しっかり保湿をしておけば、脱毛時の熱を肌内部の水分が吸収してくれるため、熱による痛みを感じにくくなります。
痛みや肌トラブルを防ぐためにも、脱毛前にはアルコール不使用のボディジェルでたっぷり保湿ケアをしておきましょう。
8-3.足脱毛体験の前後2週間前は日焼けをしない
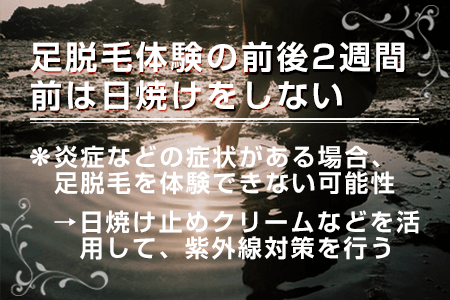
日焼けによる次のような症状がある場合は、足脱毛を体験できなくなる可能性があります。
- 赤みや皮むけなどの炎症がある
- 極端に肌が黒くなっている
体験脱毛の前後2週間は、日焼け止めクリームなどを活用して、しっかり紫外線対策を行いましょう。
8-4.足脱毛の当日は日焼け止めを使用しない

足脱毛の体験当日には、日焼け止めの使用がNGとされています。
理由は次の2つになります。
- 日焼け止めの成分に脱毛の光が反応して肌トラブルが起こる可能性がある
- 毛穴が塞がれて発毛組織に熱が届きにくくなり、脱毛効果が低下する
施術直前に拭き取っても、毛穴に日焼け止めの成分が残ってしまうことがあります。
体験当日は日焼け止めを塗らず、服装を工夫して紫外線対策を行いましょう。
8-5.ワイドパンツやロングスカートで足脱毛の体験に行く

足脱毛の体験に行く際は、次のような服装を選ぶのがおすすめです。
- ワイドパンツ
- ロングスカート
これらの服装がおすすめな理由としては次の3つが挙げられます。
- 着替えがしやすい
- ゆったりしていて肌の刺激になりにくい
- 紫外線対策にもなる
スキニーパンツやタイツは肌との摩擦が起こりやすいため、おすすめできません。
脱毛後は肌に熱がこもりやすいので、通気性が良い天然素材のアイテムを選びましょう。
9.まとめ
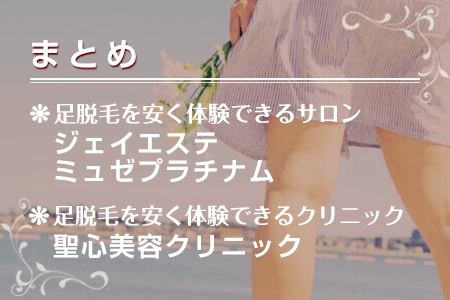
人気の脱毛サロンには、1,000円以下でひざ下脱毛を体験できるキャンペーンがたくさんあります。
この機会にキャンペーンを活用して、安くお得にひざ下脱毛を始めましょう。

- 【2200円〜】VIO脱毛をお試し体験できるキャンペーン
- 【2200円〜】顔脱毛をお試し体験できるキャンペーン情報
- 【330円で完了】ワキ脱毛をお試し体験できるキャンペーン
- 【330円〜】足・ひざ下脱毛をお試し体験できるキャンペーン
- ひじ下・ひじ上・腕脱毛をお試し体験できるキャンペーン
- 全身脱毛をお試し体験できるキャンペーン一覧